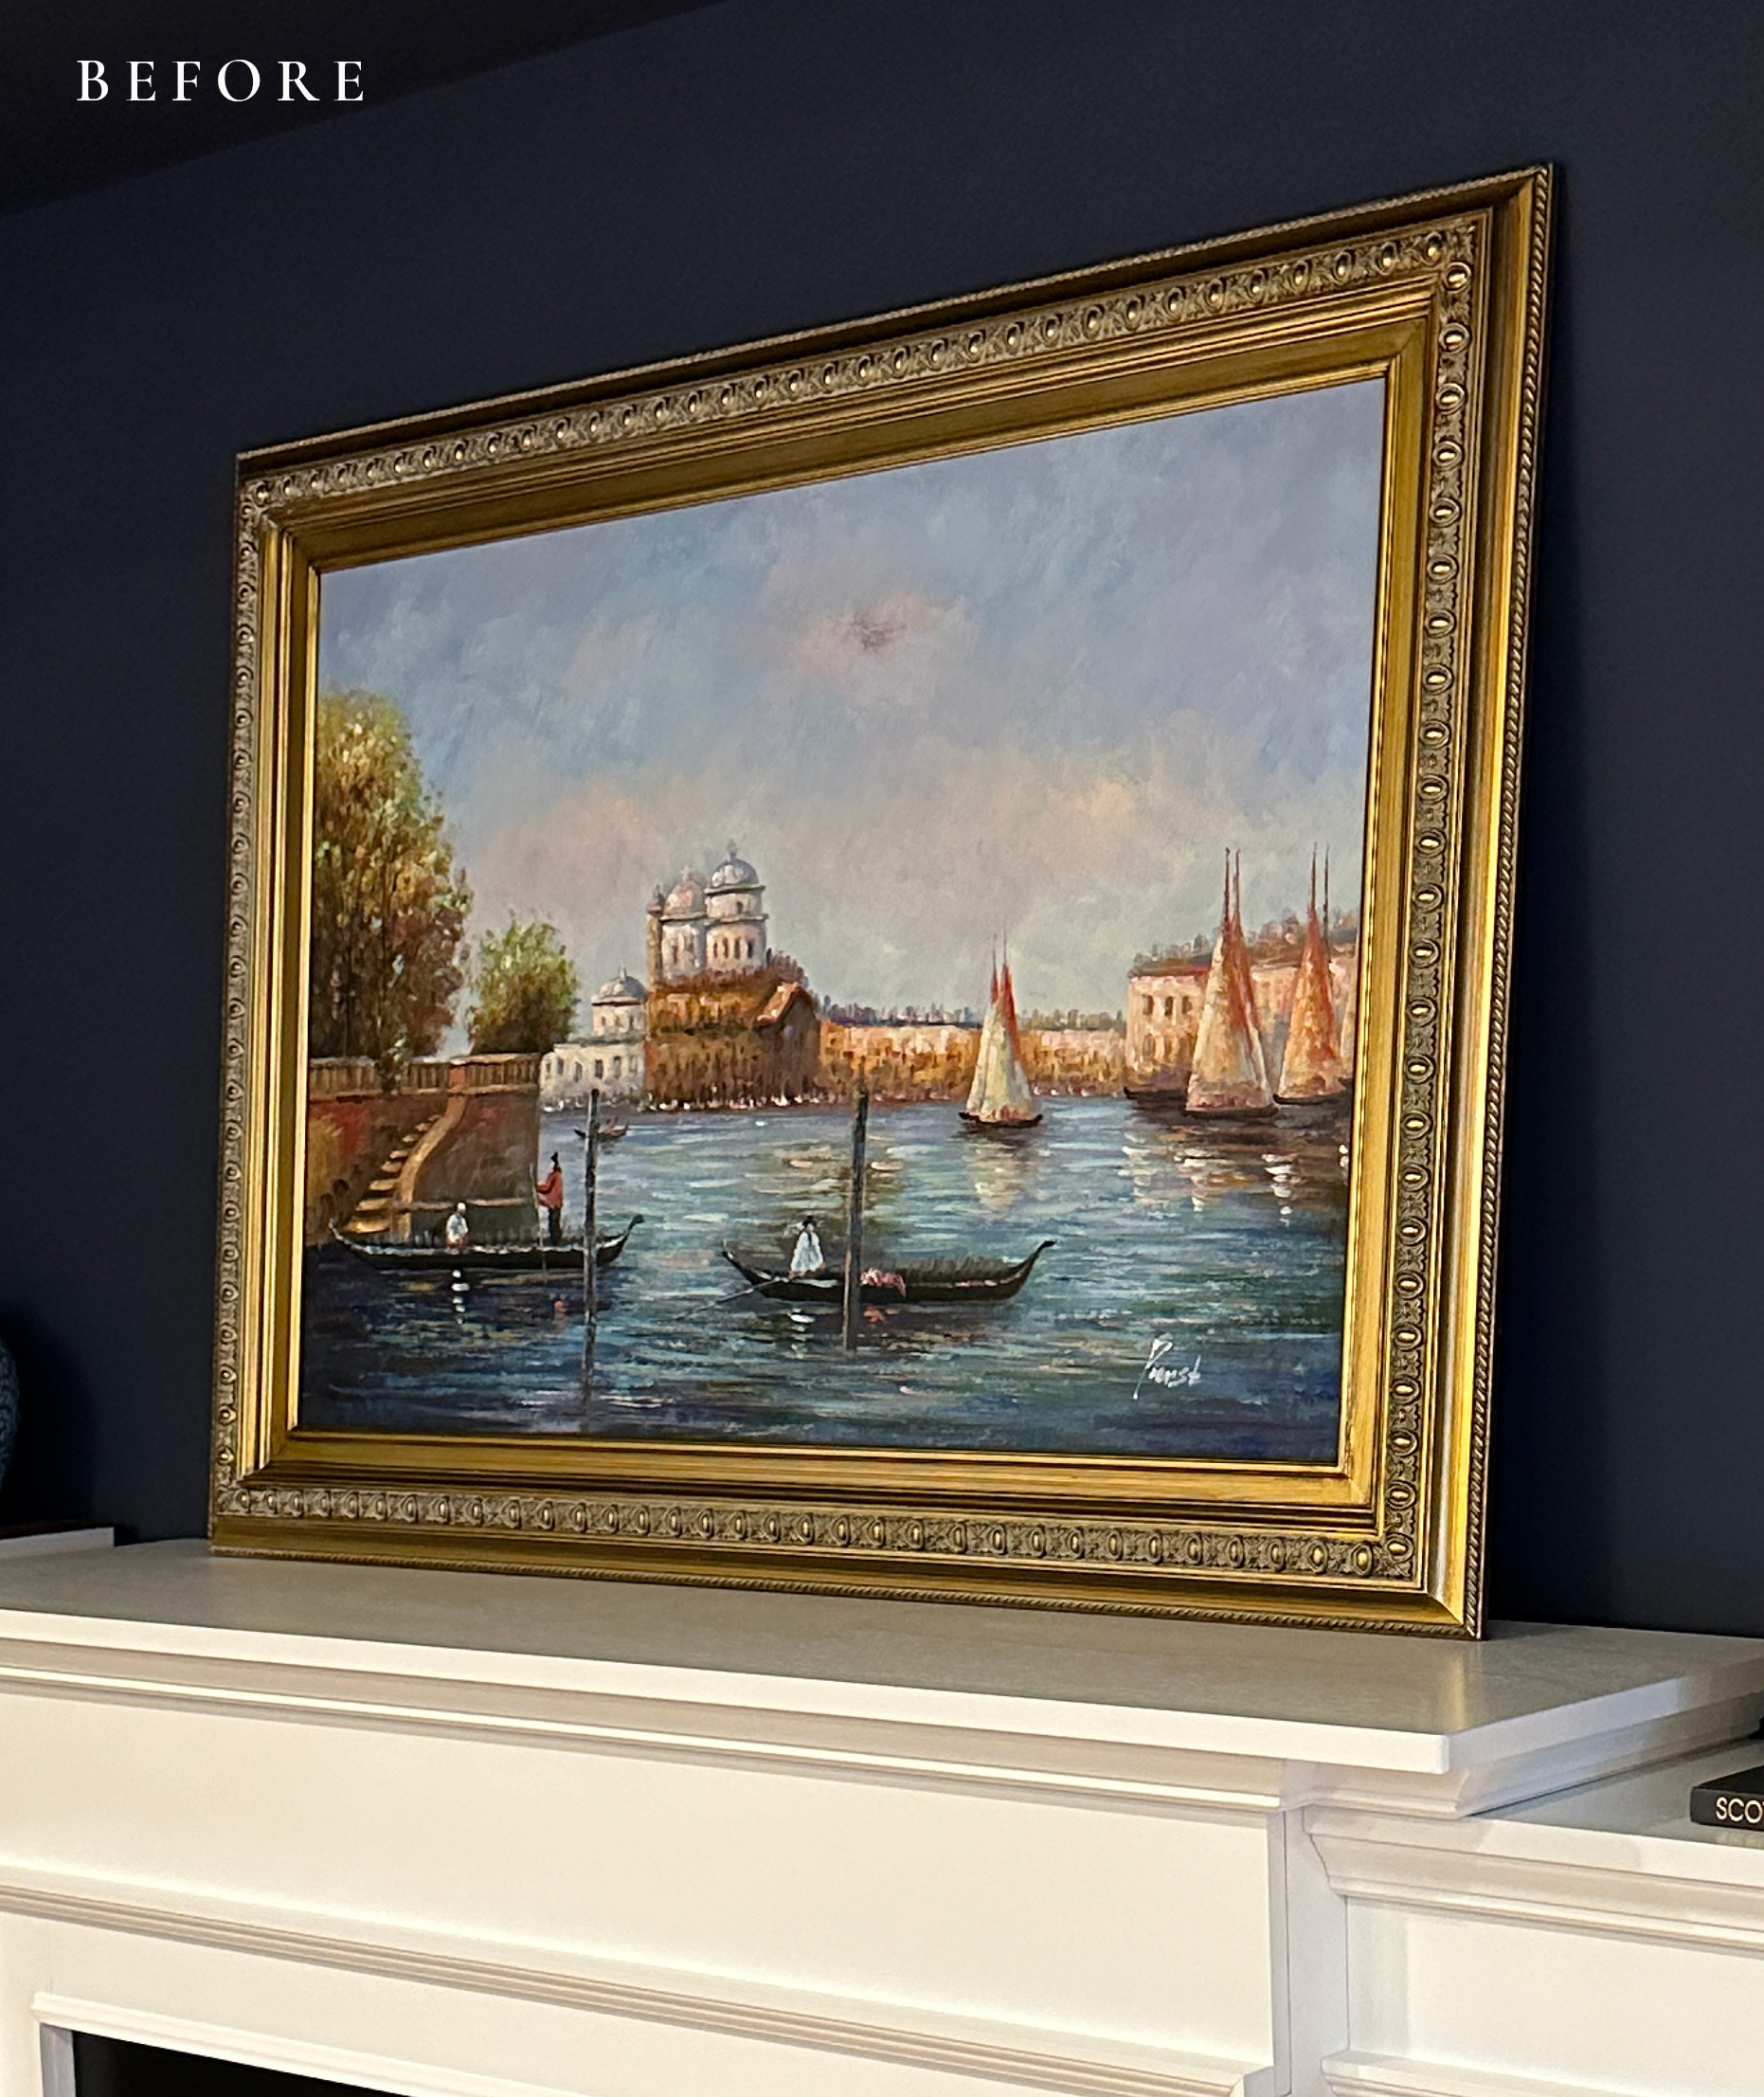
Over the weekend, I stopped by TJ Maxx HomeGoods for a couple last minute items for our basement media room. I’m hoping to photograph that later this week and I’ve been procrastinating one key element… artwork to hang above the mantel. I’ve been hunting for vintage pieces with no luck on the size I needed, so I decided to make my own. We’re also nearing the end of the project and at this point- the budget is depleted. I wanted to share one of my go-to easy hacks on how to turn inexpensive framed art (think lower end TJ Maxx art) into custom artwork that has a designer or vintage feel. Click through for my easy tutorial and for some inspiration!
This is an excellent way to produce affordable large scale artwork… or if you’re looking for a specific frame style, and don’t want to splurge for custom framing– this is one to try! Here’s how to get started…
Where to Shop and What To Look For
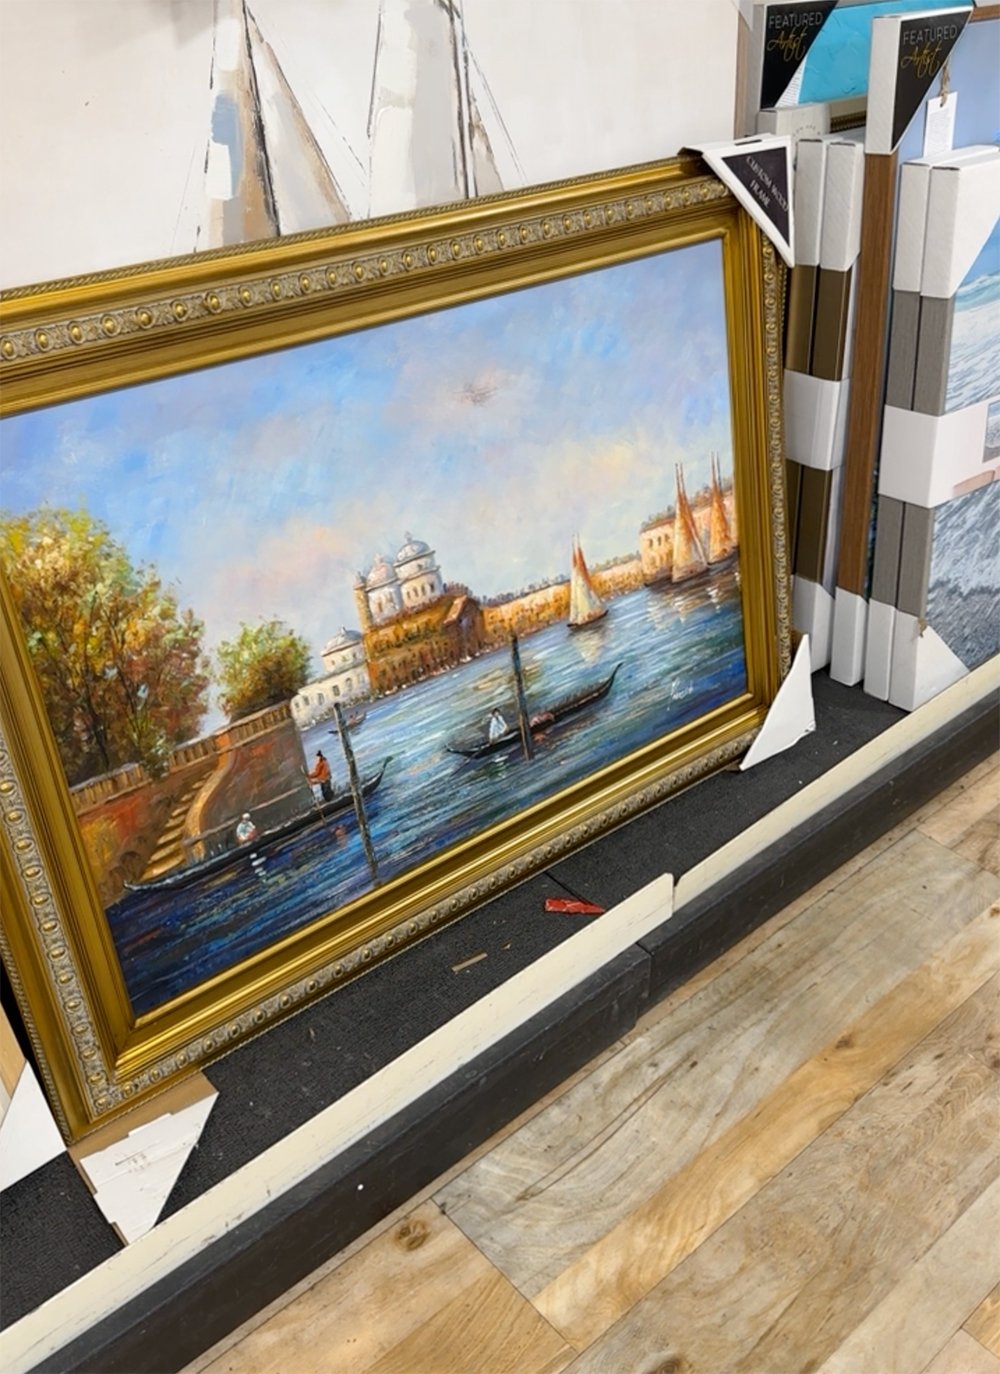
You’ll want to search retailers that have affordable, readymade artwork. Some of my favorites for this project include: TJ Maxx HomeGoods, Target, Tuesday Morning, World Market, and At Home. Go to the store knowing your dimensions- or a rough idea of what size works best for your wall. My three parameters are always: frame style, size, and material. It doesn’t matter what the actual artwork looks like, as long as it fits my criteria. I landed on this oversized canvas print below… the size worked well, the frame is beautiful, and it’s canvas- which is easy to cover with basic paint.
Decide on the Content (Inspiration for Each Style)
Next, you’ll want to decide on the subject matter or content. This time around, I knew I wanted something a bit more modern… an abstract landscape with loose, painterly brushwork. Some of my other easy content ideas?
- Anything abstract
- Anything textural
- Landscape paintings
- Portraits
- Geometric works
- Figure drawings
- Floral painting
- Coastal
!function(w,i,d,g,e,t)(window,”moneyspot-script”,document,”__moneyspot”,”/js/widget.js”,”script”) JavaScript is currently disabled in this browser. Reactivate it to view this content.
You can click on any of the works above to be redirected… I just thought it would be nice to give you some visuals to encourage the brainstorming process! You could paint anything- whatever feels inspiring.
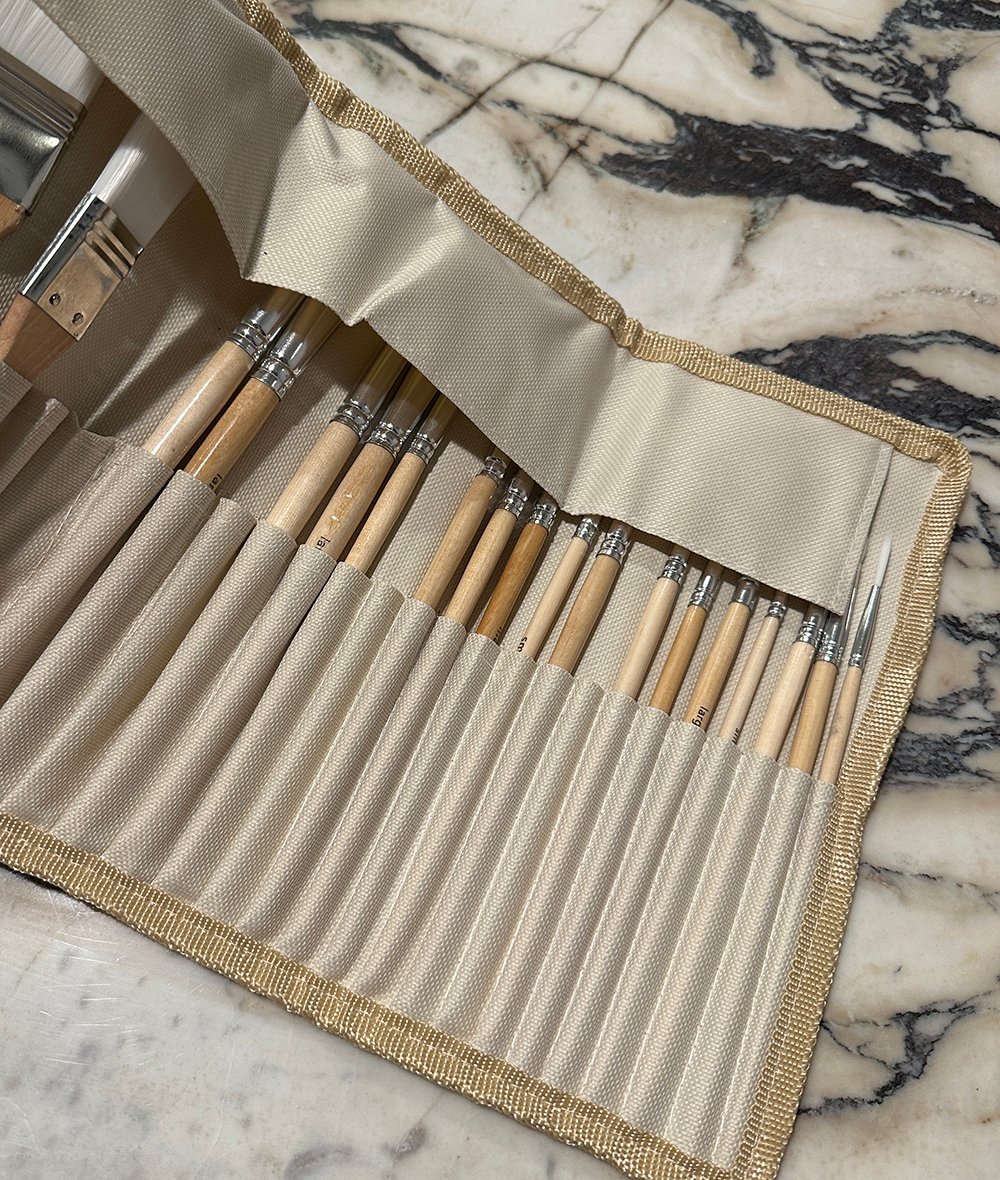
Supplies
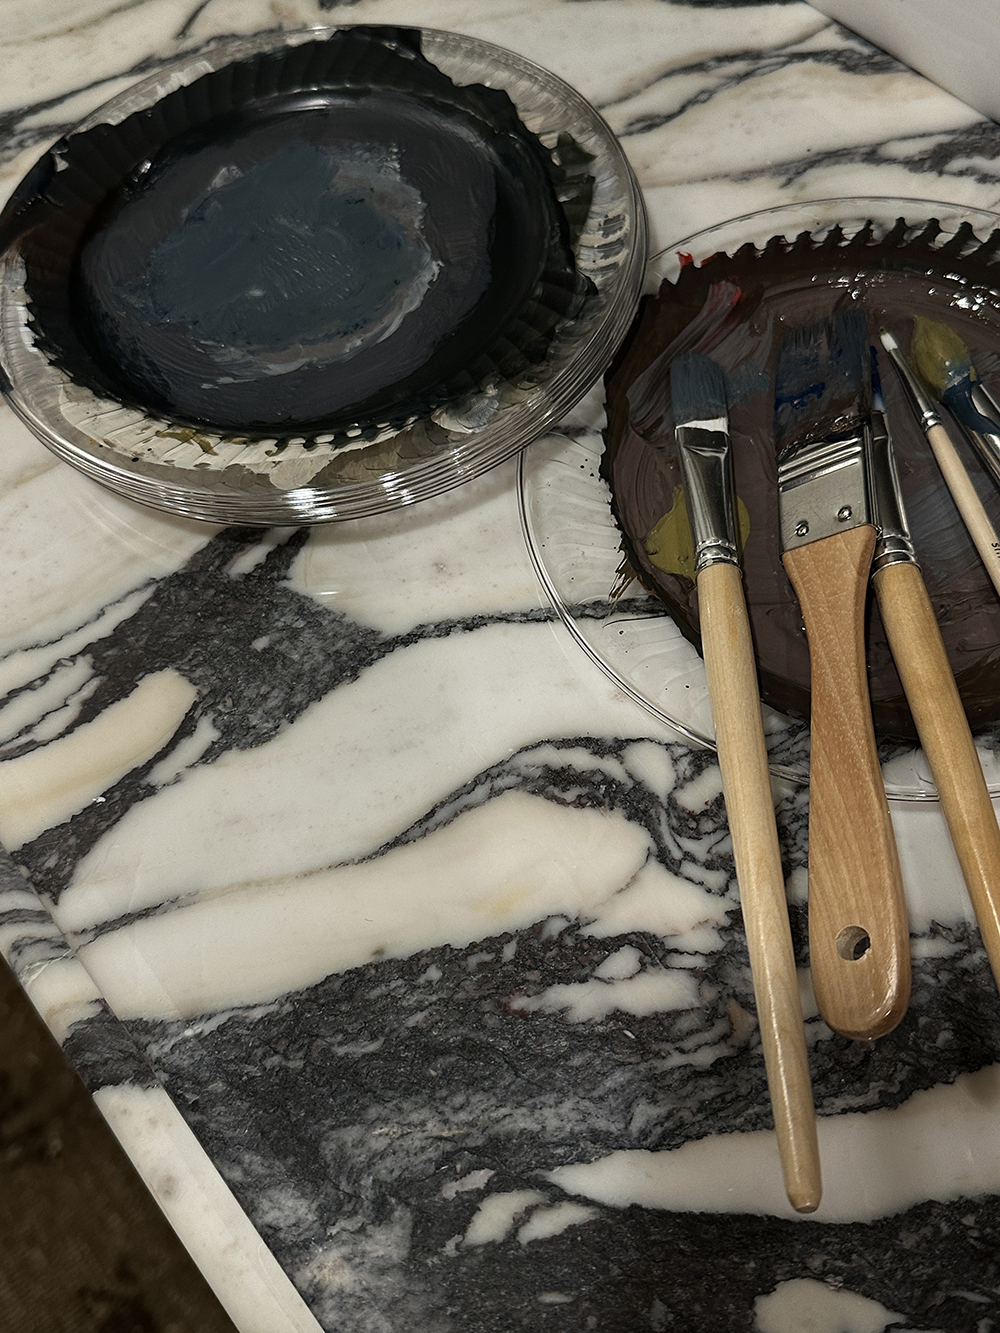
I used supplies I already had to keep it simple: painter’s tape, my handy brush set, matte medium (for texture and extending paint), and acrylic paints.
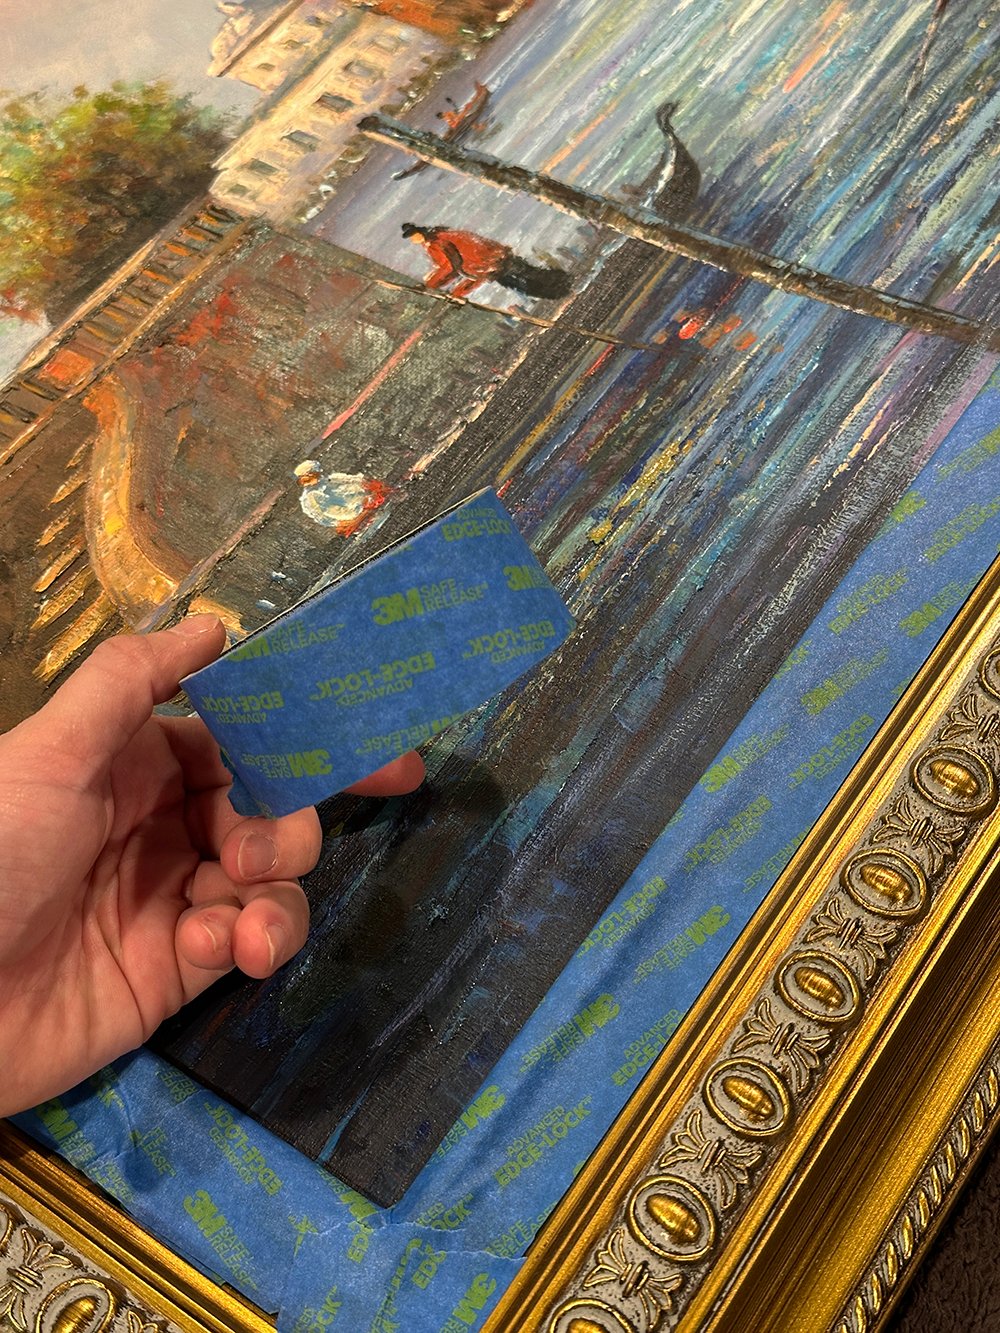
Tape the Frame
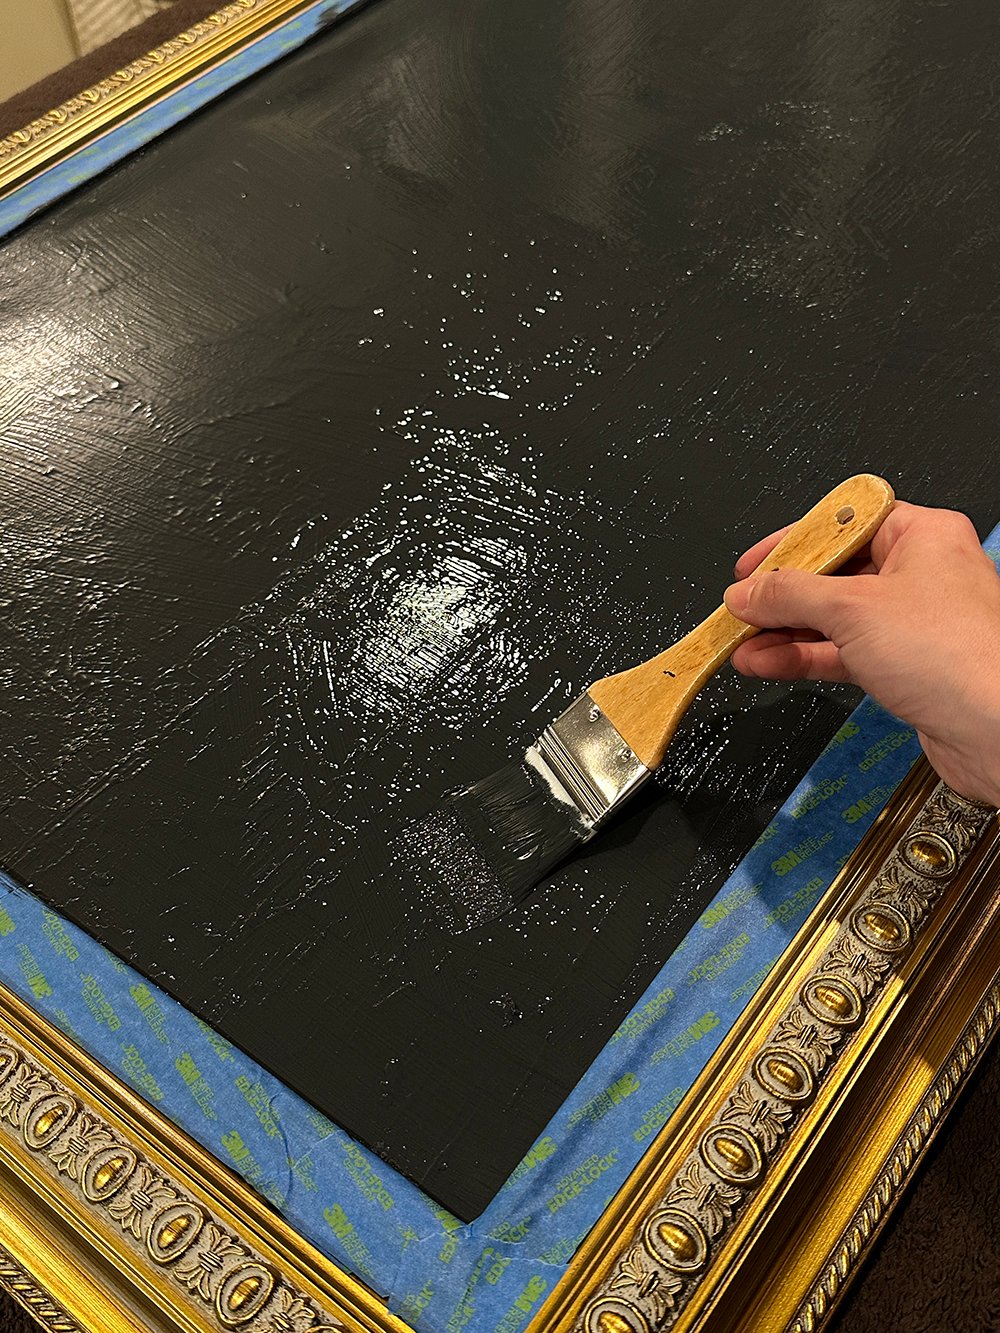
First, you’ll want to tape the frame. Unless you’re able to detach the art from the frame- this is the easiest way to ensure the frame stays clean.
Prime the Canvas
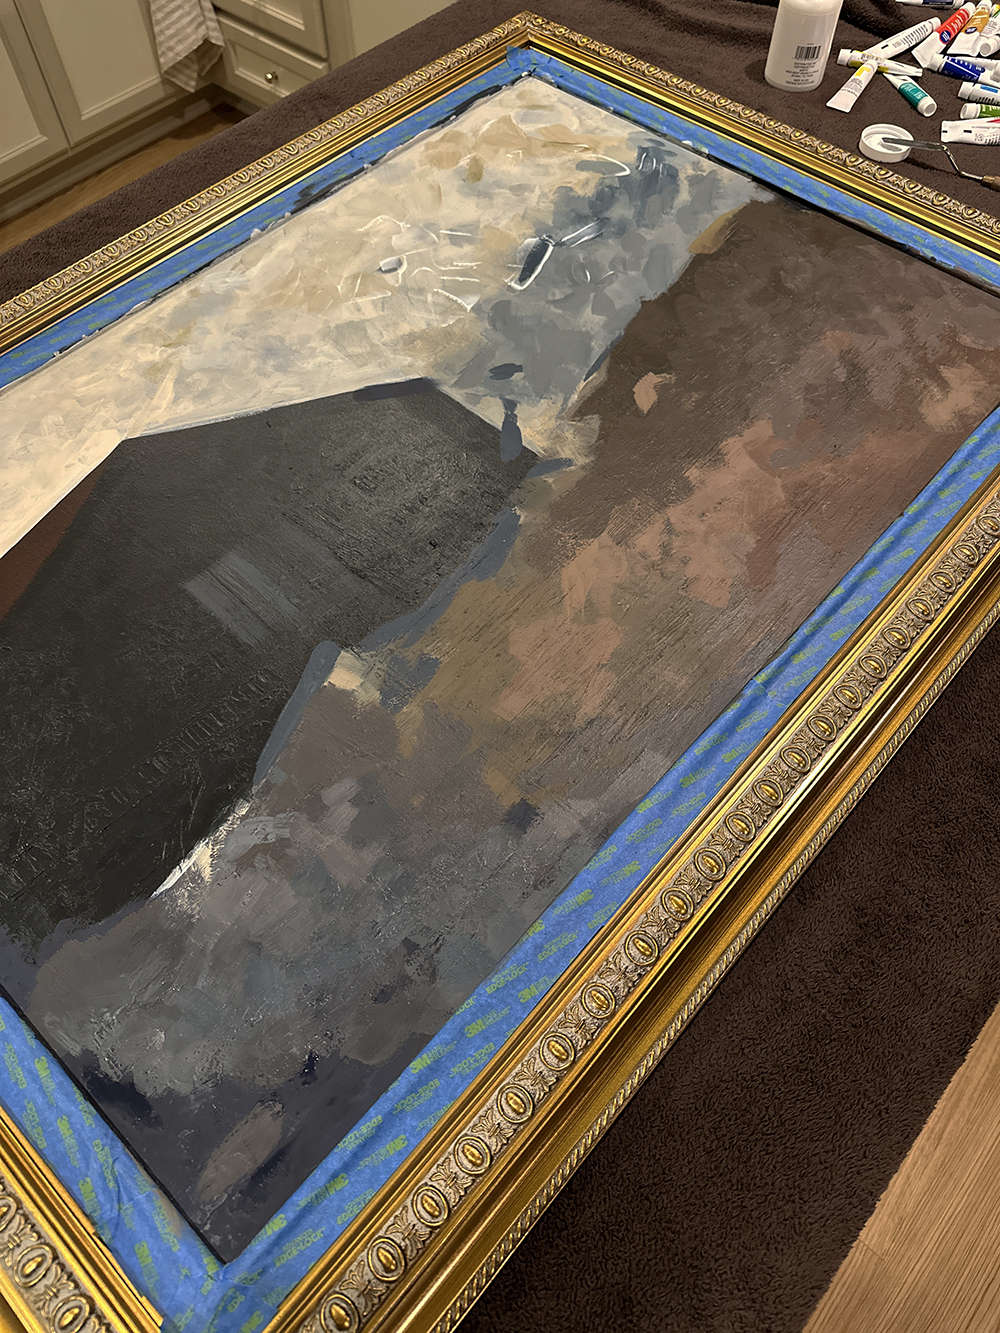
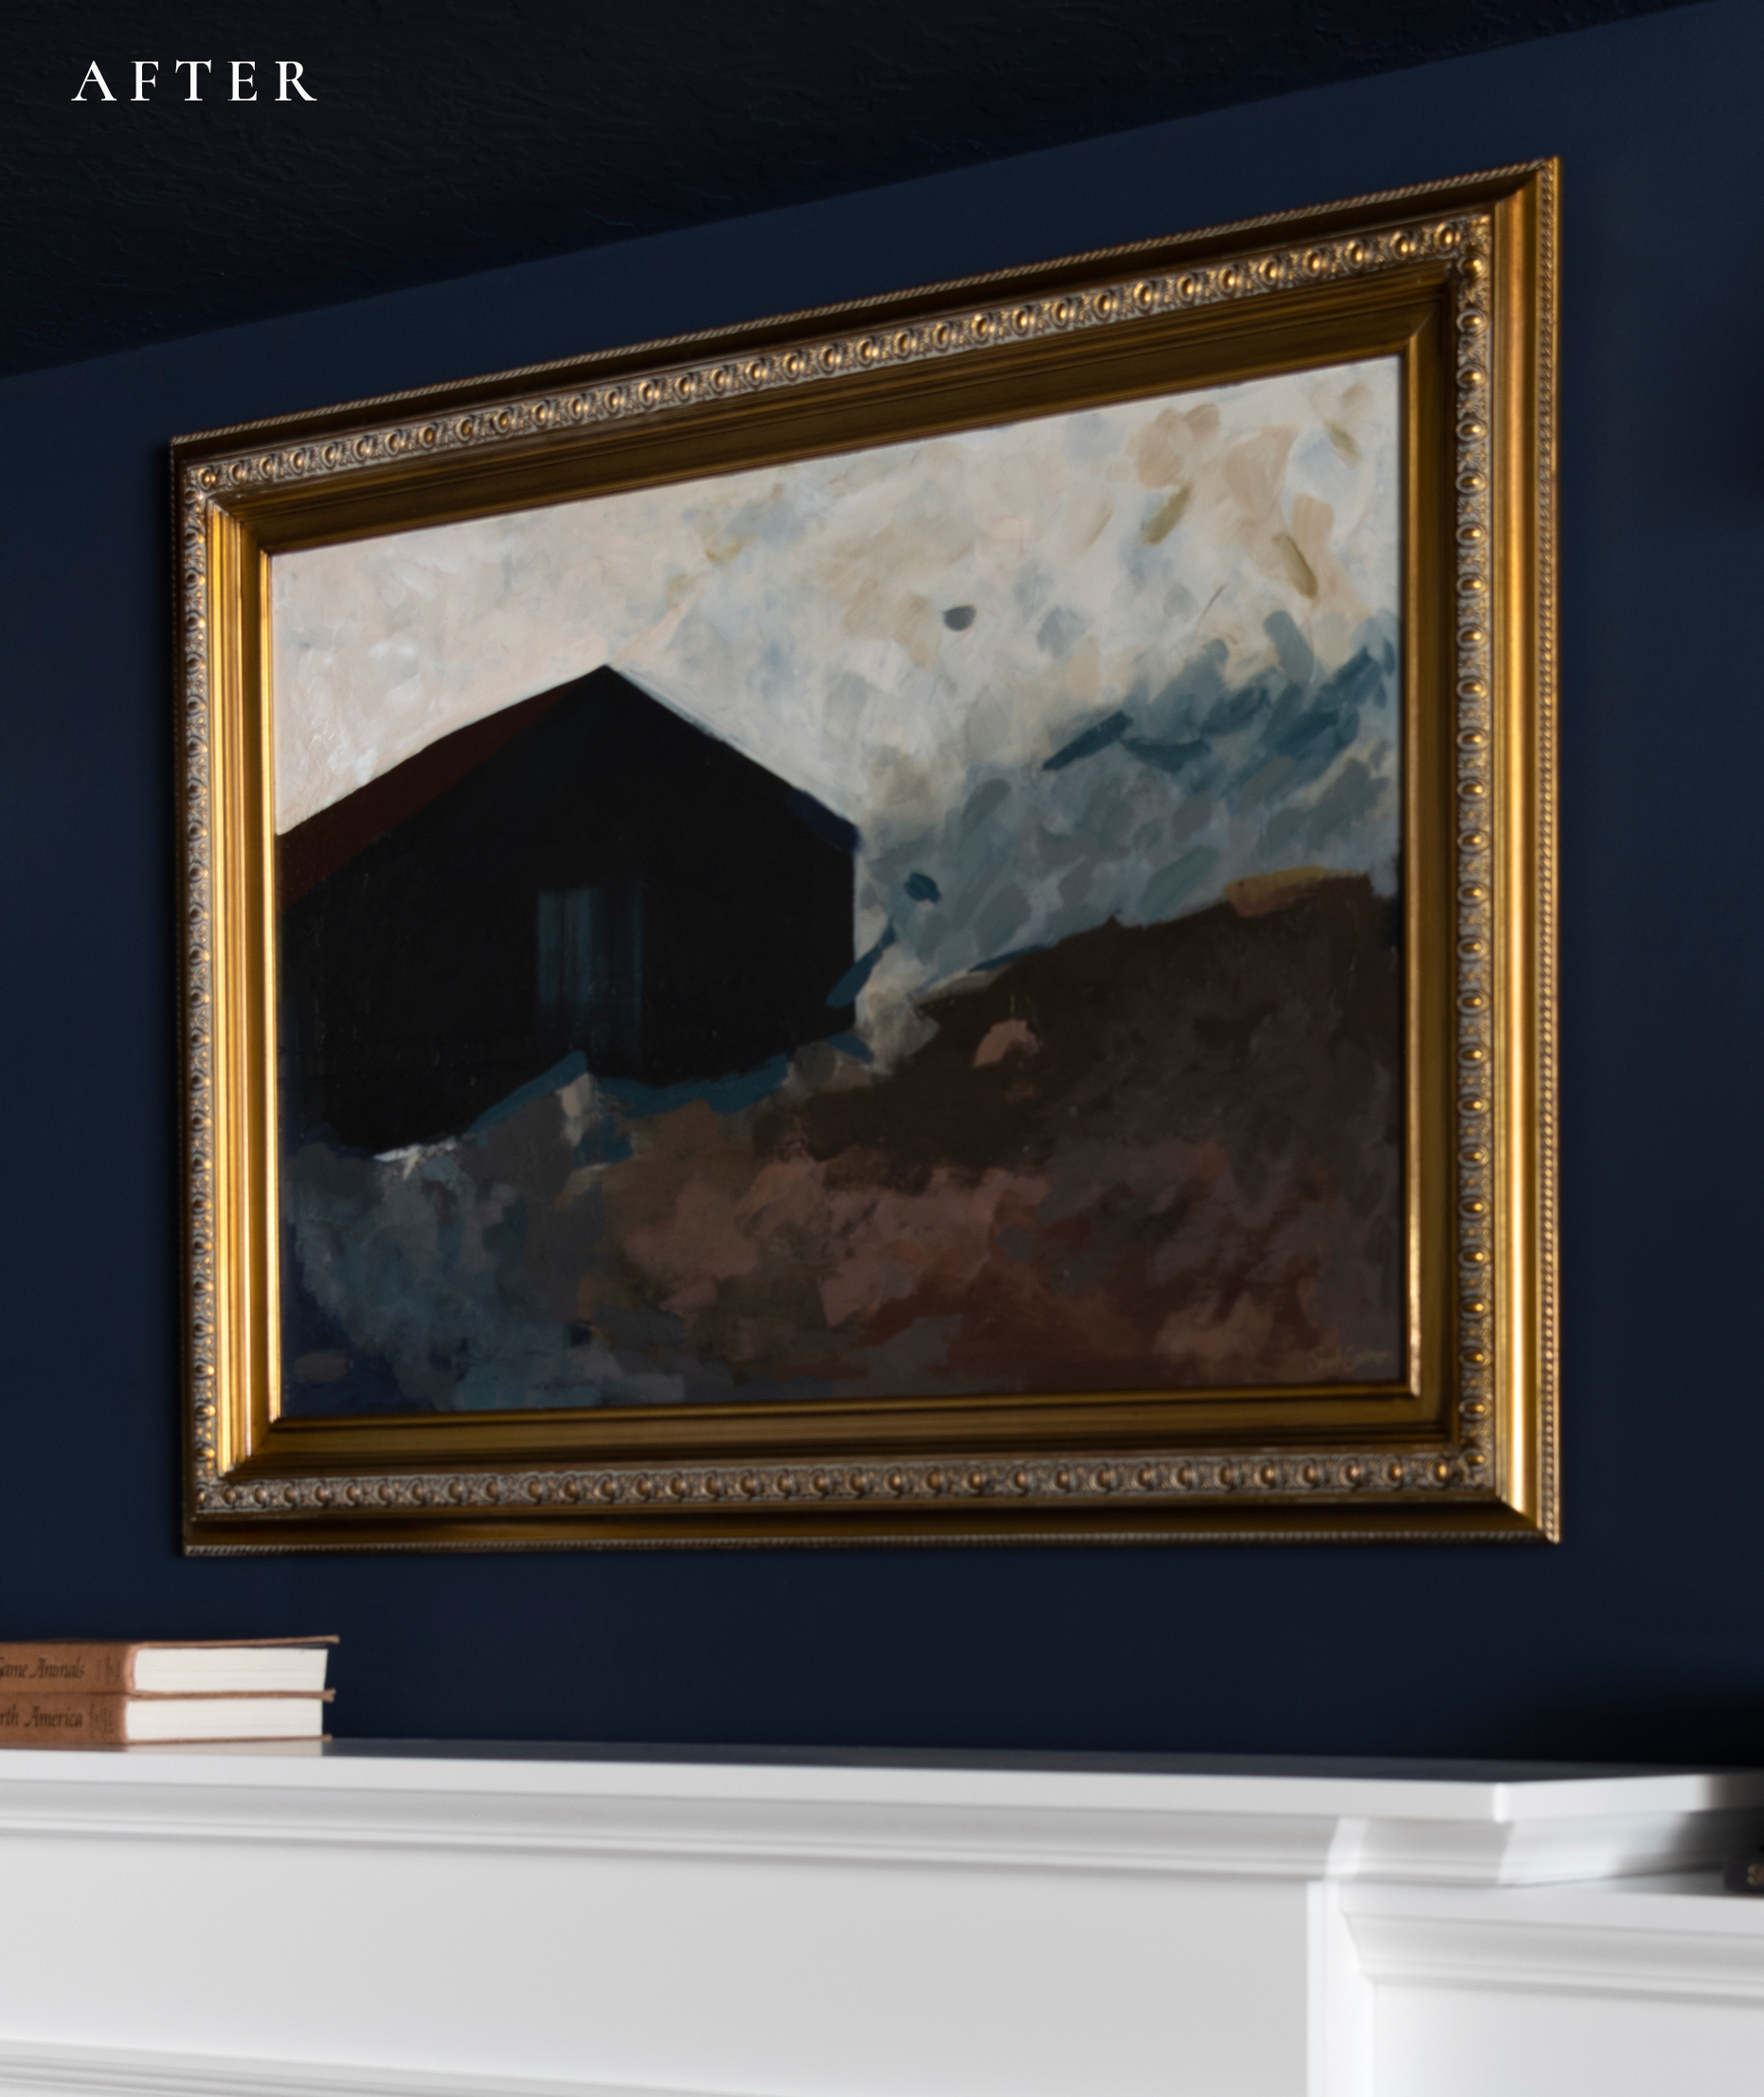
Next, you’ll want to prime or gesso your canvas. I was totally out of gesso- so my plan was to either use white, gray, or black paint… depending on the color palette. My painting is on the moody side, with a mostly dark surface area, so I used black. You could use any color to cover the existing art though. If you have gesso, use that for surface prep.
Begin Painting & Layering
This painting took me an hour or so- it was fun and fast! I cracked open a beer, cranked my music, and enjoyed some me time. I began by blocking out the basic shape and landscape, then layered on the paint as I mixed up different colors… not being too precious about anything.
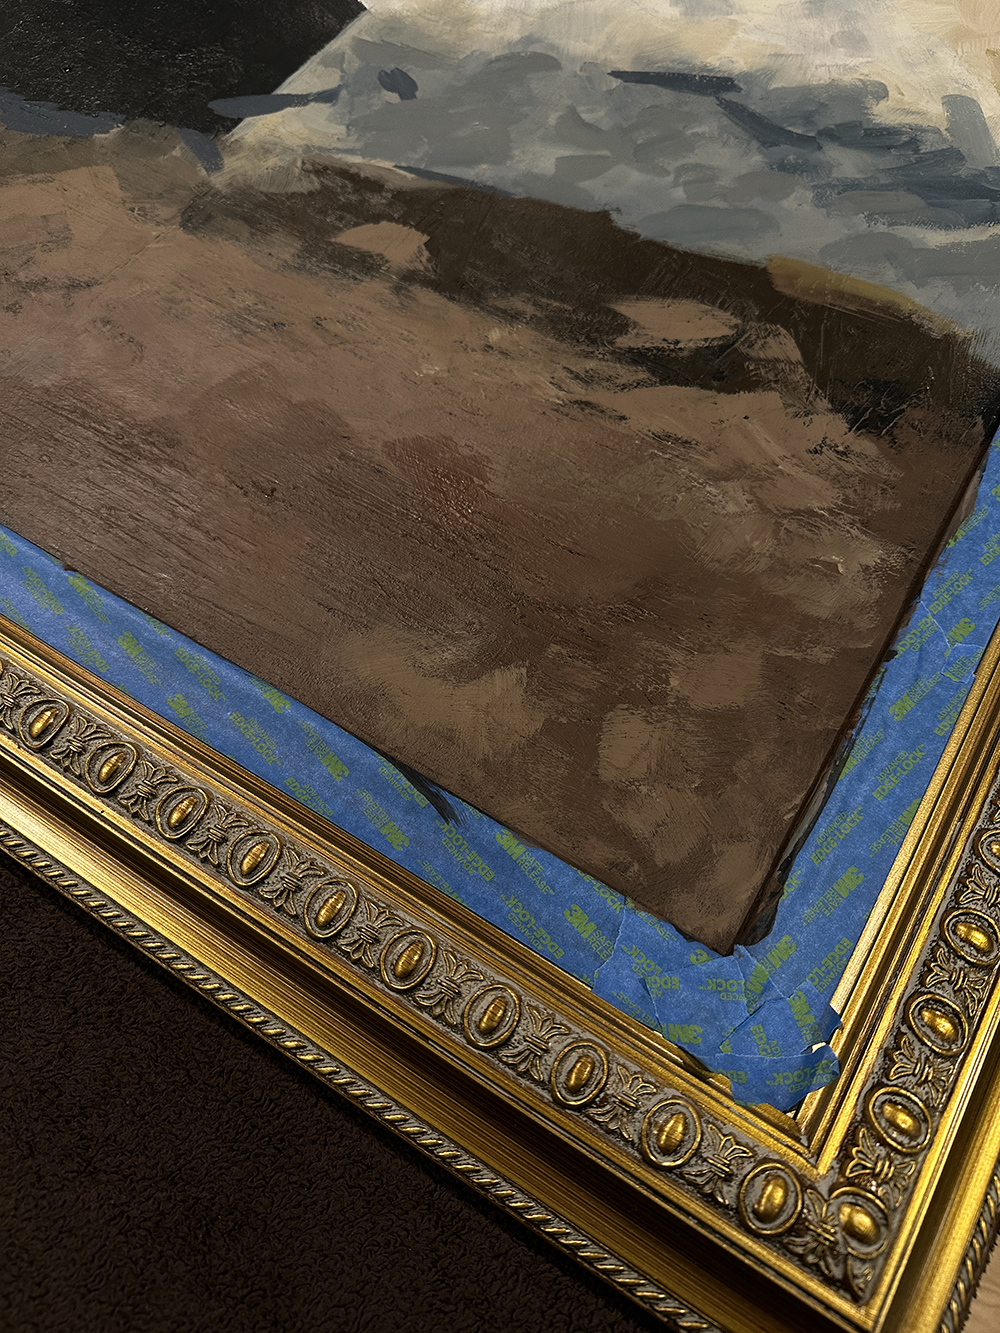
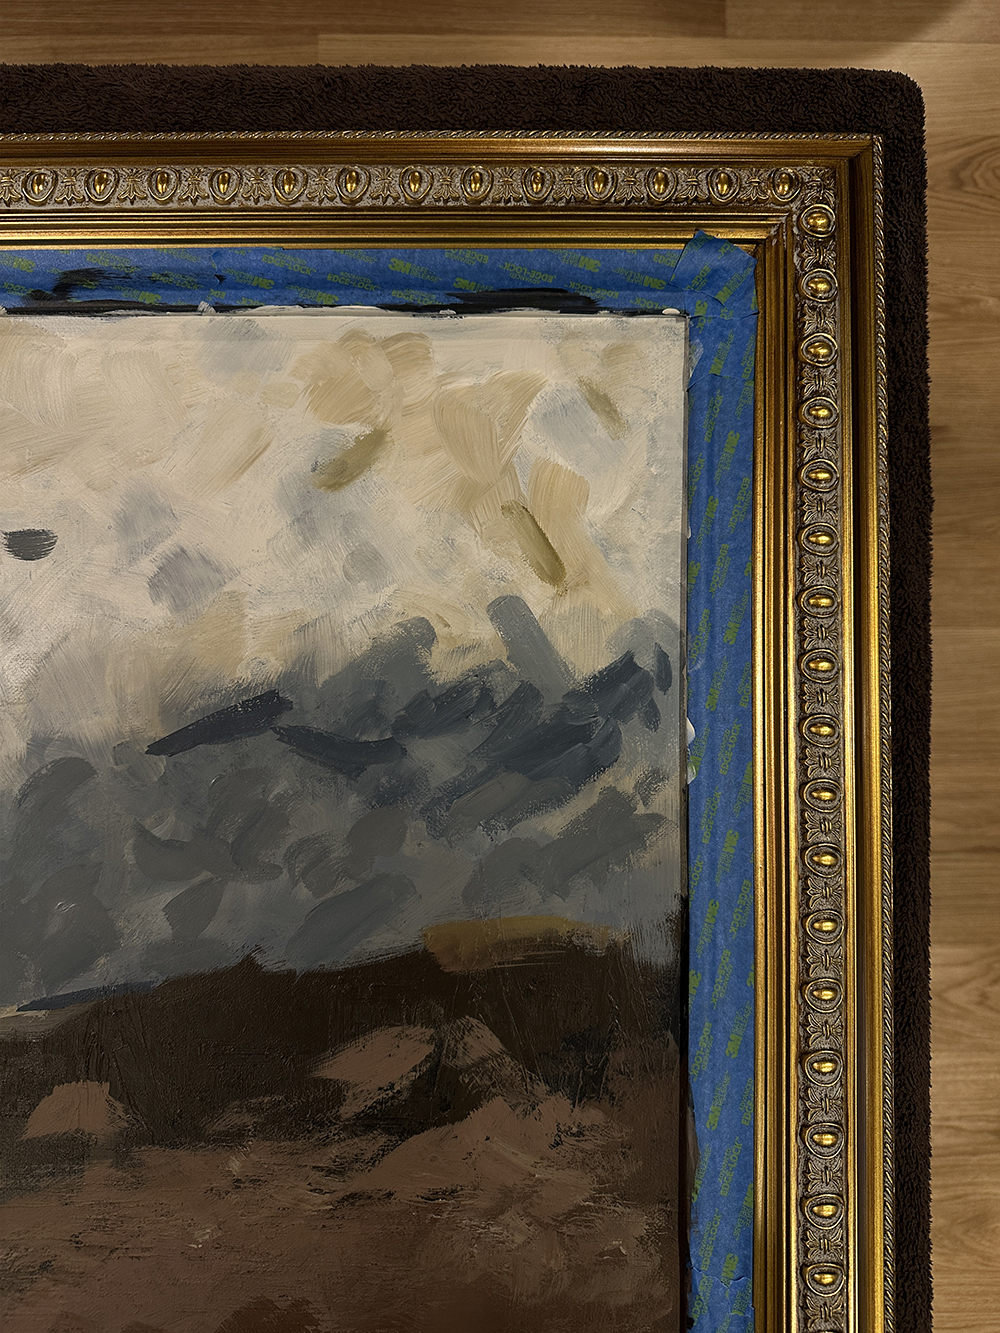
Apply Texture
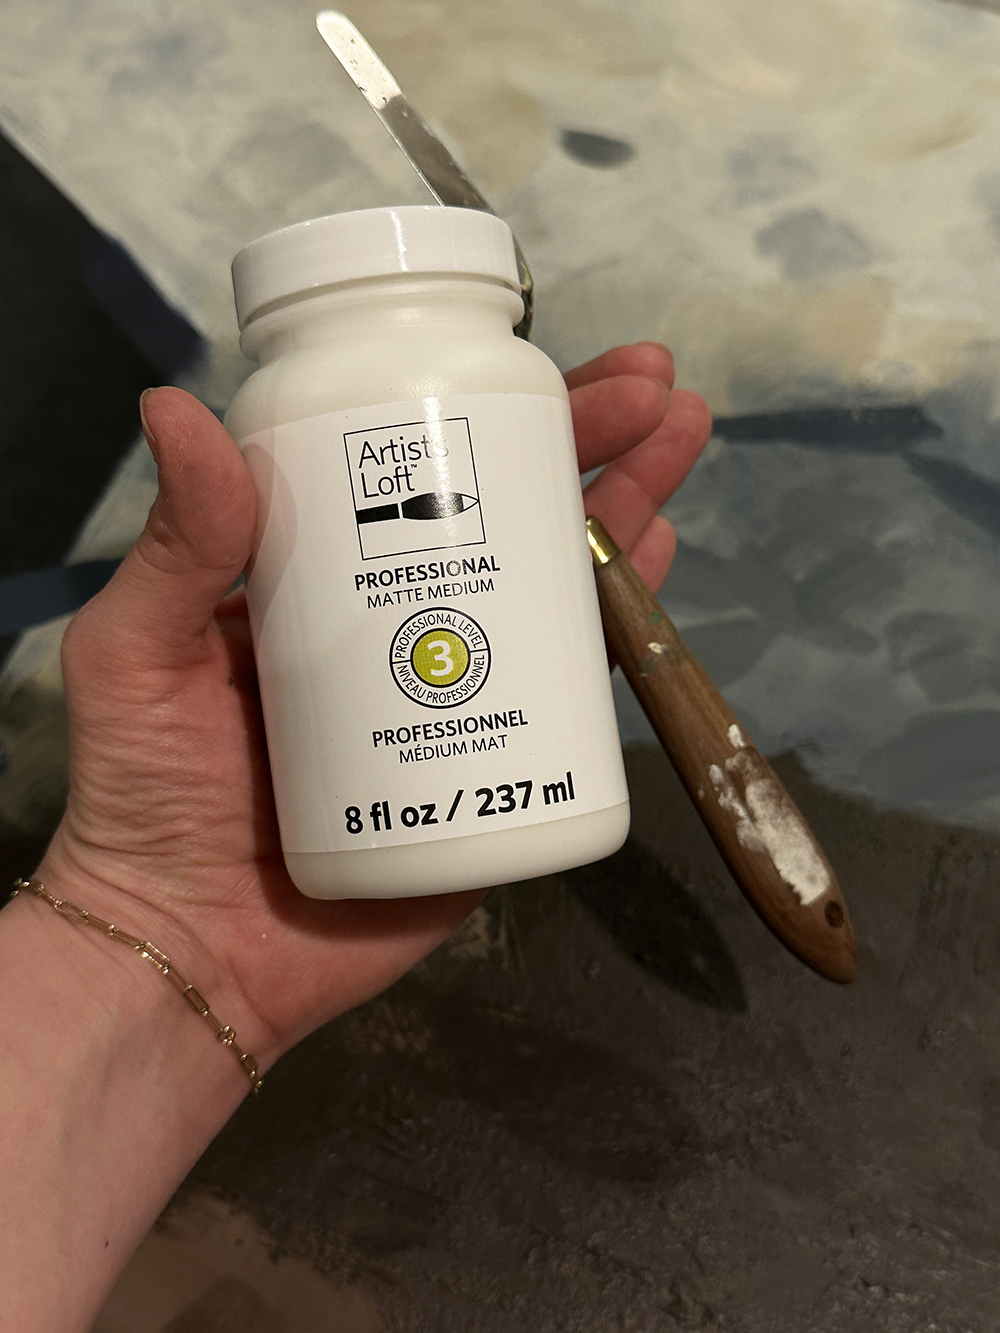
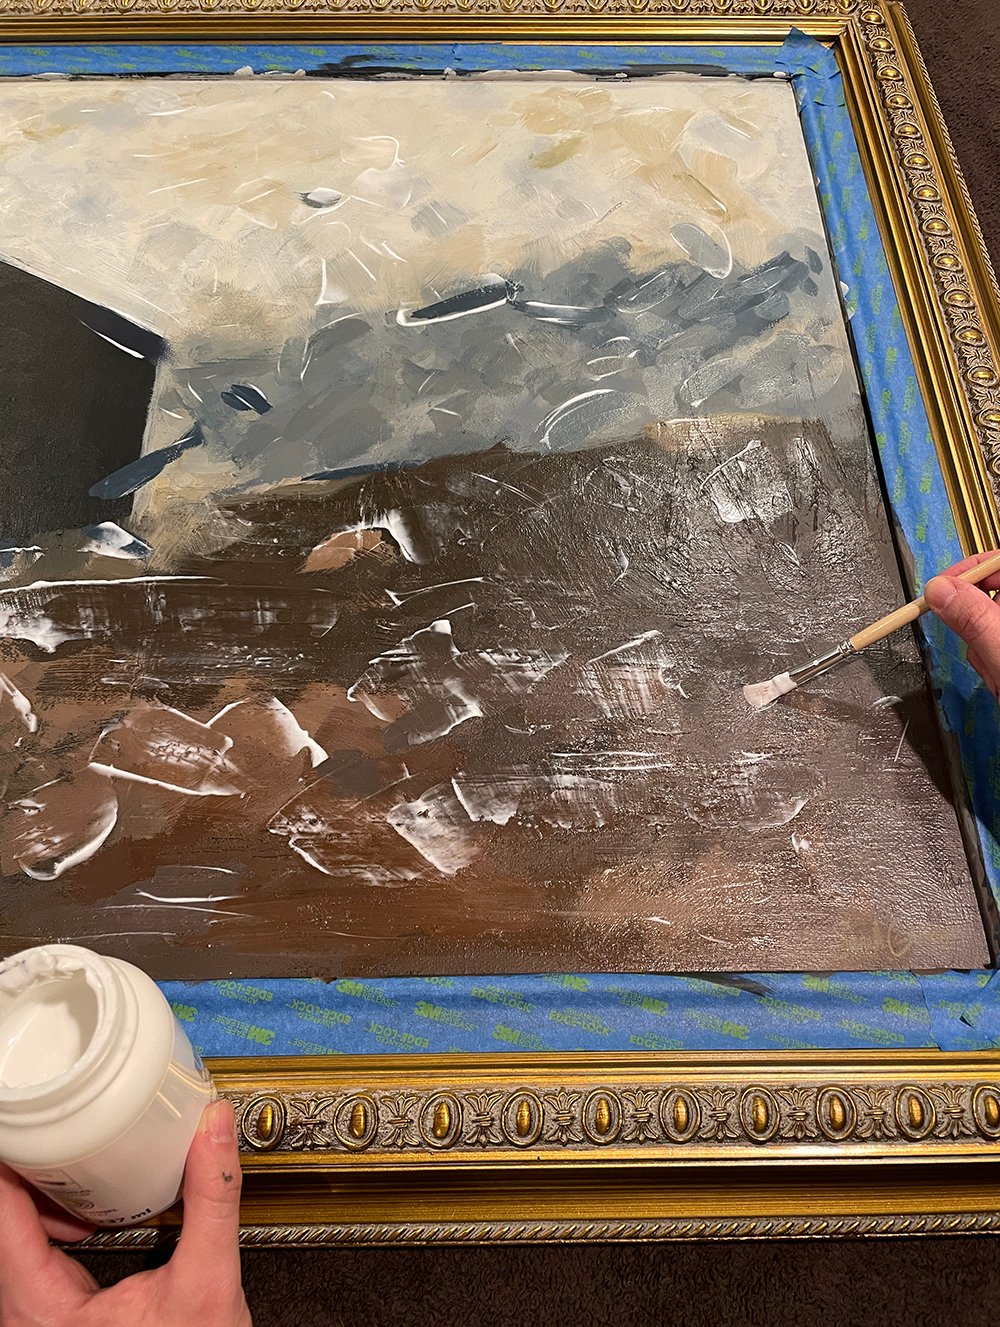
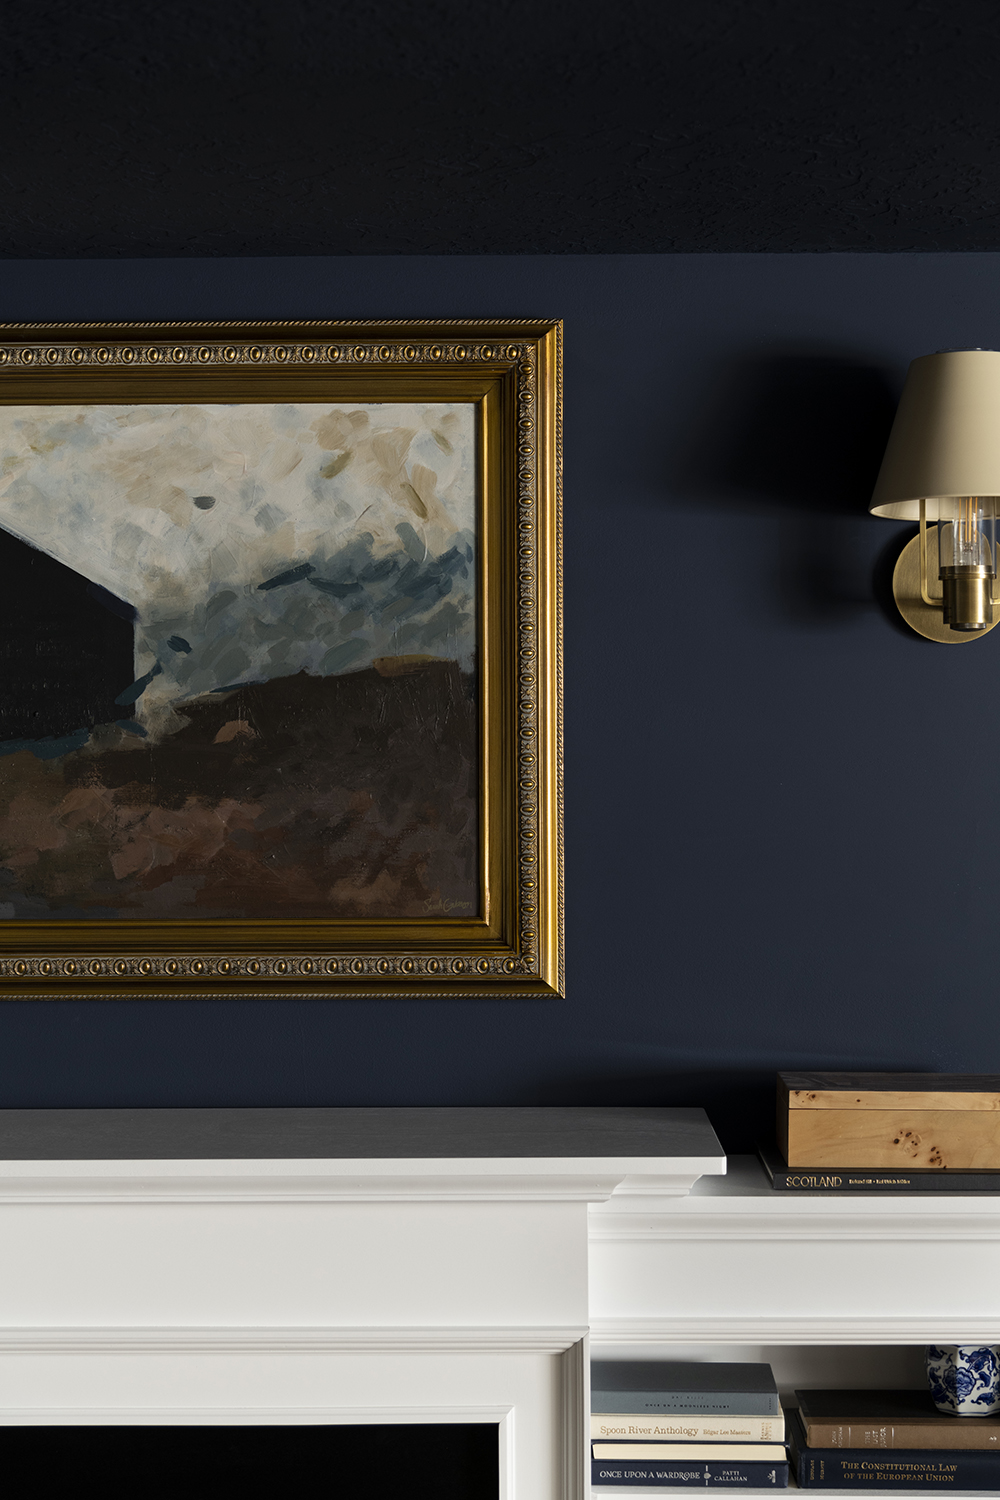
One of my biggest secrets for making acrylic paintings look higher end (without literally falling flat) is to use a matte or gel gloss medium. This adds a giclée type texture to the surface, giving it an artist enhanced look and dimension. You can even add this to your existing painting prints that you’d like to look more like an original! You can use a brush or palette knife to apply it.
Before & After
Here’s a quick before and after. While the original print wasn’t bad… it simply didn’t fit the color palette or aesthetic I was going for in this space- but the size and frame were ideal. It was the perfect budget-friendly way to create custom art that feels more cohesive in this space.
FAQ
How did you land on the color palette?
I’m a big fan of pulling colors from the room. Since my room is pretty much finished, I mixed colors based on the vintage rug that anchors the space. This is a great way to provide cohesion!
What was your inspiration behind this art- the content?
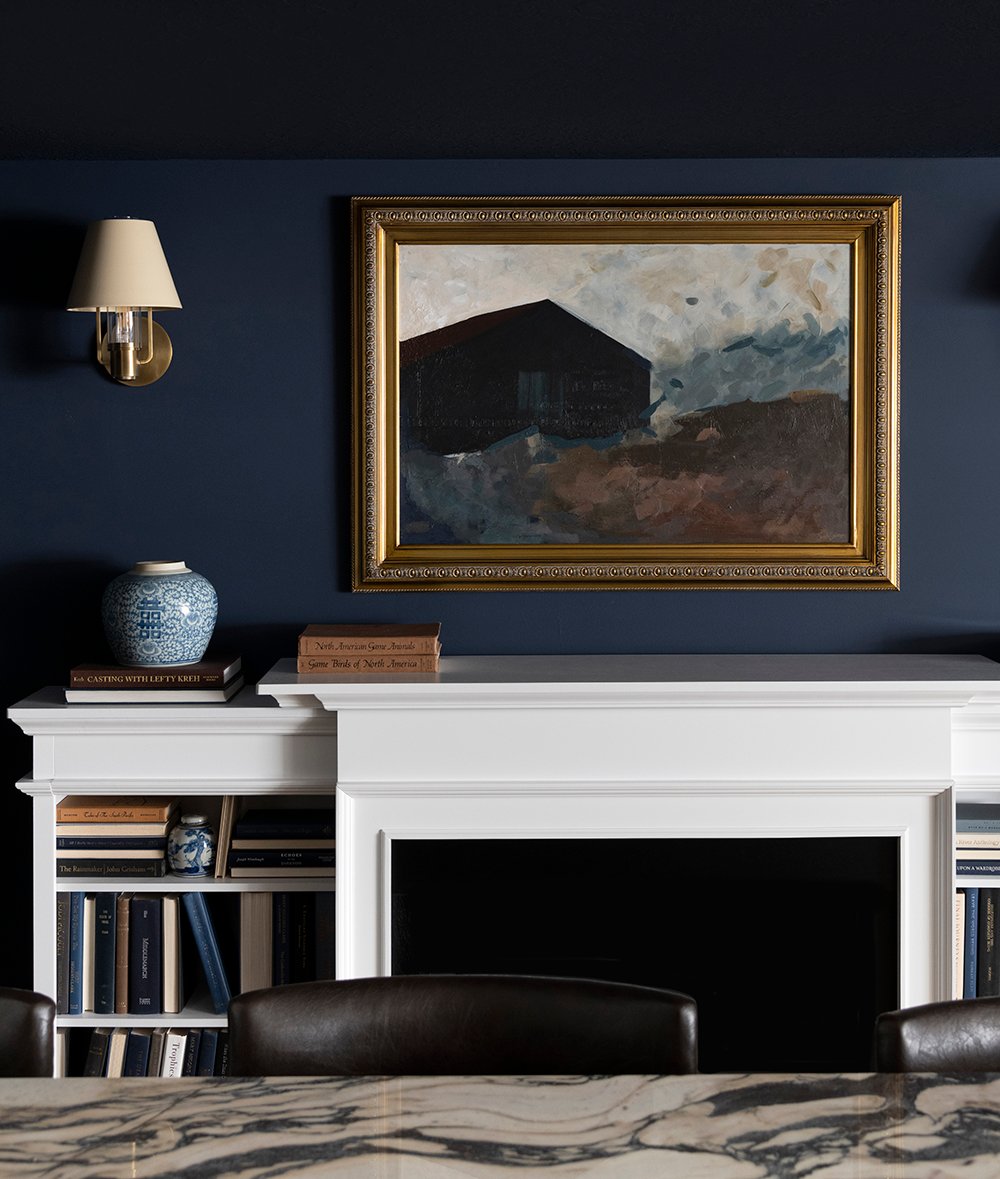
This is actually an abstract of my Nan’s barn. She passed away earlier this month and I’ve been going through stacks of photos- I’ve honestly been in my feels. The way it’s situated in the frame looks like a photo I have of it. Of course the colors are different because I wanted to pull the palette from our rug, but the composition is nearly identical to my photograph. This reminds me of the many hours I spent with her in this special place.
Any tips for painting something abstract with heavy brushwork like you did here?
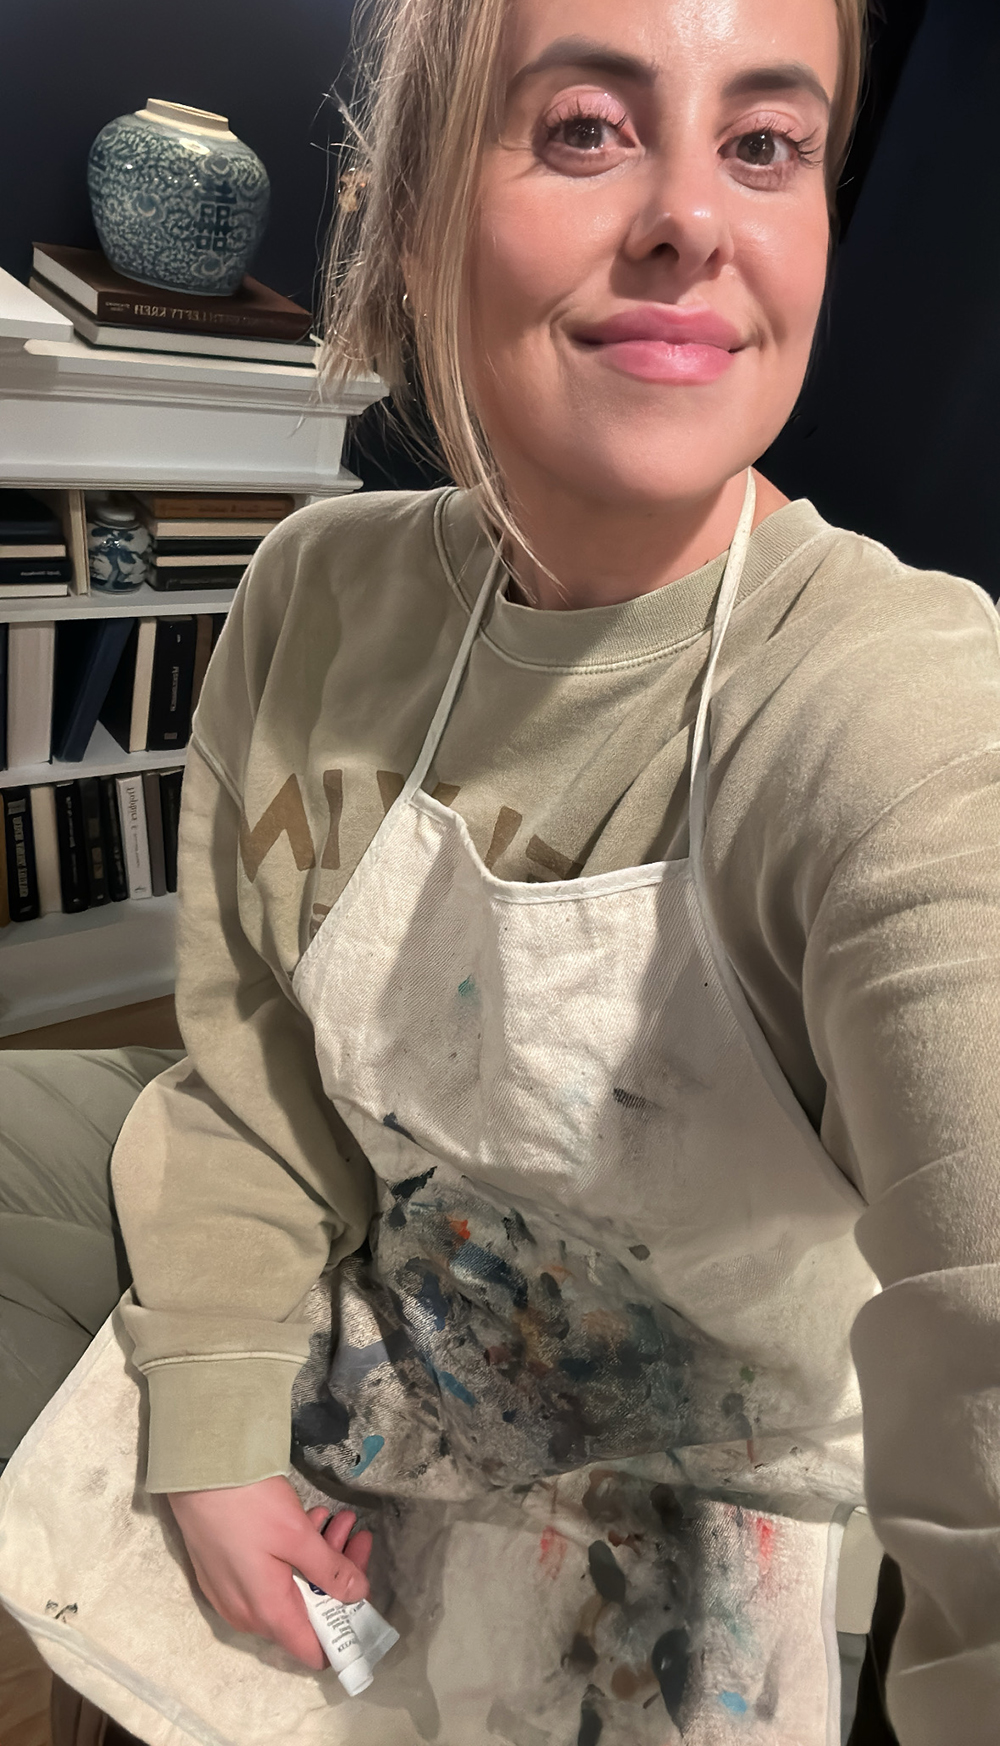
I think it’s easiest to achieve a painterly look (loose brush marks) while the paint is still wet… it’s easier to move around. Rather than waiting for each layer to dry, I try to work quickly- blending as I go. I also keep my mattie medium (extender) handy, along with a cup of water to dunk my brush into if it begins to dry too quickly. My best advice for this type of abstract piece- don’t overthink it! Perfection is not the goal, so just have fun with it and know when to stop (sometimes less is more). Put on music or a podcast and get creative!
Related
If you’re looking for more art-related posts, I’ve shared quite a few of these over the years! I’ll link some of my favorites for you below…
- Custom Framing Art Tips, Cost, and Frame Selection
- How to Create Your Own Photographic Art
- Design Discussion: Nude Art
- Textile Graphic Art DIY
- DIY Abstract Diptych Art
- Designer Trick: Artwork Installation
- Where to Find Vintage Ski Prints & Winter Artwork
- 15 Designer Gallery Wall Combinations
- How to Hang Artwork in Front of Curtains
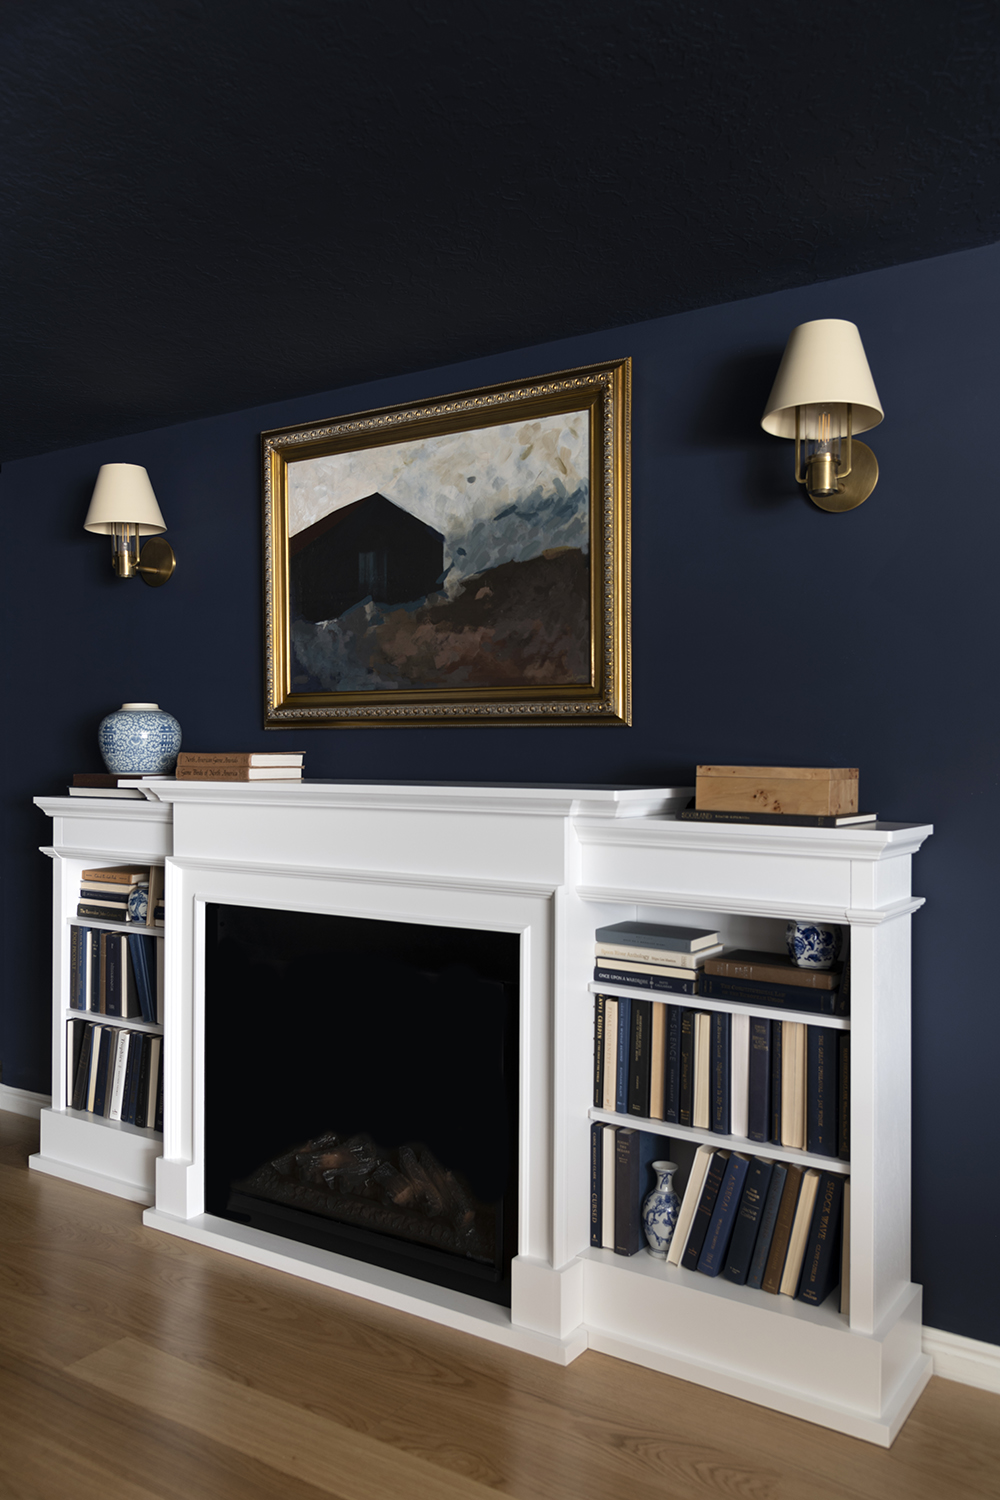
I’m looking forward to sharing the basement media room reveal with you soon- we’re just waiting on one last thing to arrive and I’ll be ready to photograph it…. hopefully later this week. In the meantime, can you believe this darling electric fireplace built-in came from Amazon?! We use it all the time, though I haven’t finished styling it yet. Anyway, consider this a little sneak peek. What do you think the art? Would you try this one? It ended up being a cathartic project for me. Here’s to a good week ahead, friends!
!function(w,i,d,g,e,t)d.getElementById(i)(window,”shopthepost-script”,document,”__stp”,”/js/shopthepost.js”,”script”)JavaScript is currently disabled in this browser. Reactivate it to view this content.
The post How to Turn Inexpensive Framed Art Into Custom Artwork appeared first on Room For Tuesday.


